Showing posts with label Heroquest. Show all posts

Wednesday, August 16, 2023

Byron's Army of Zargon - Wrap up post


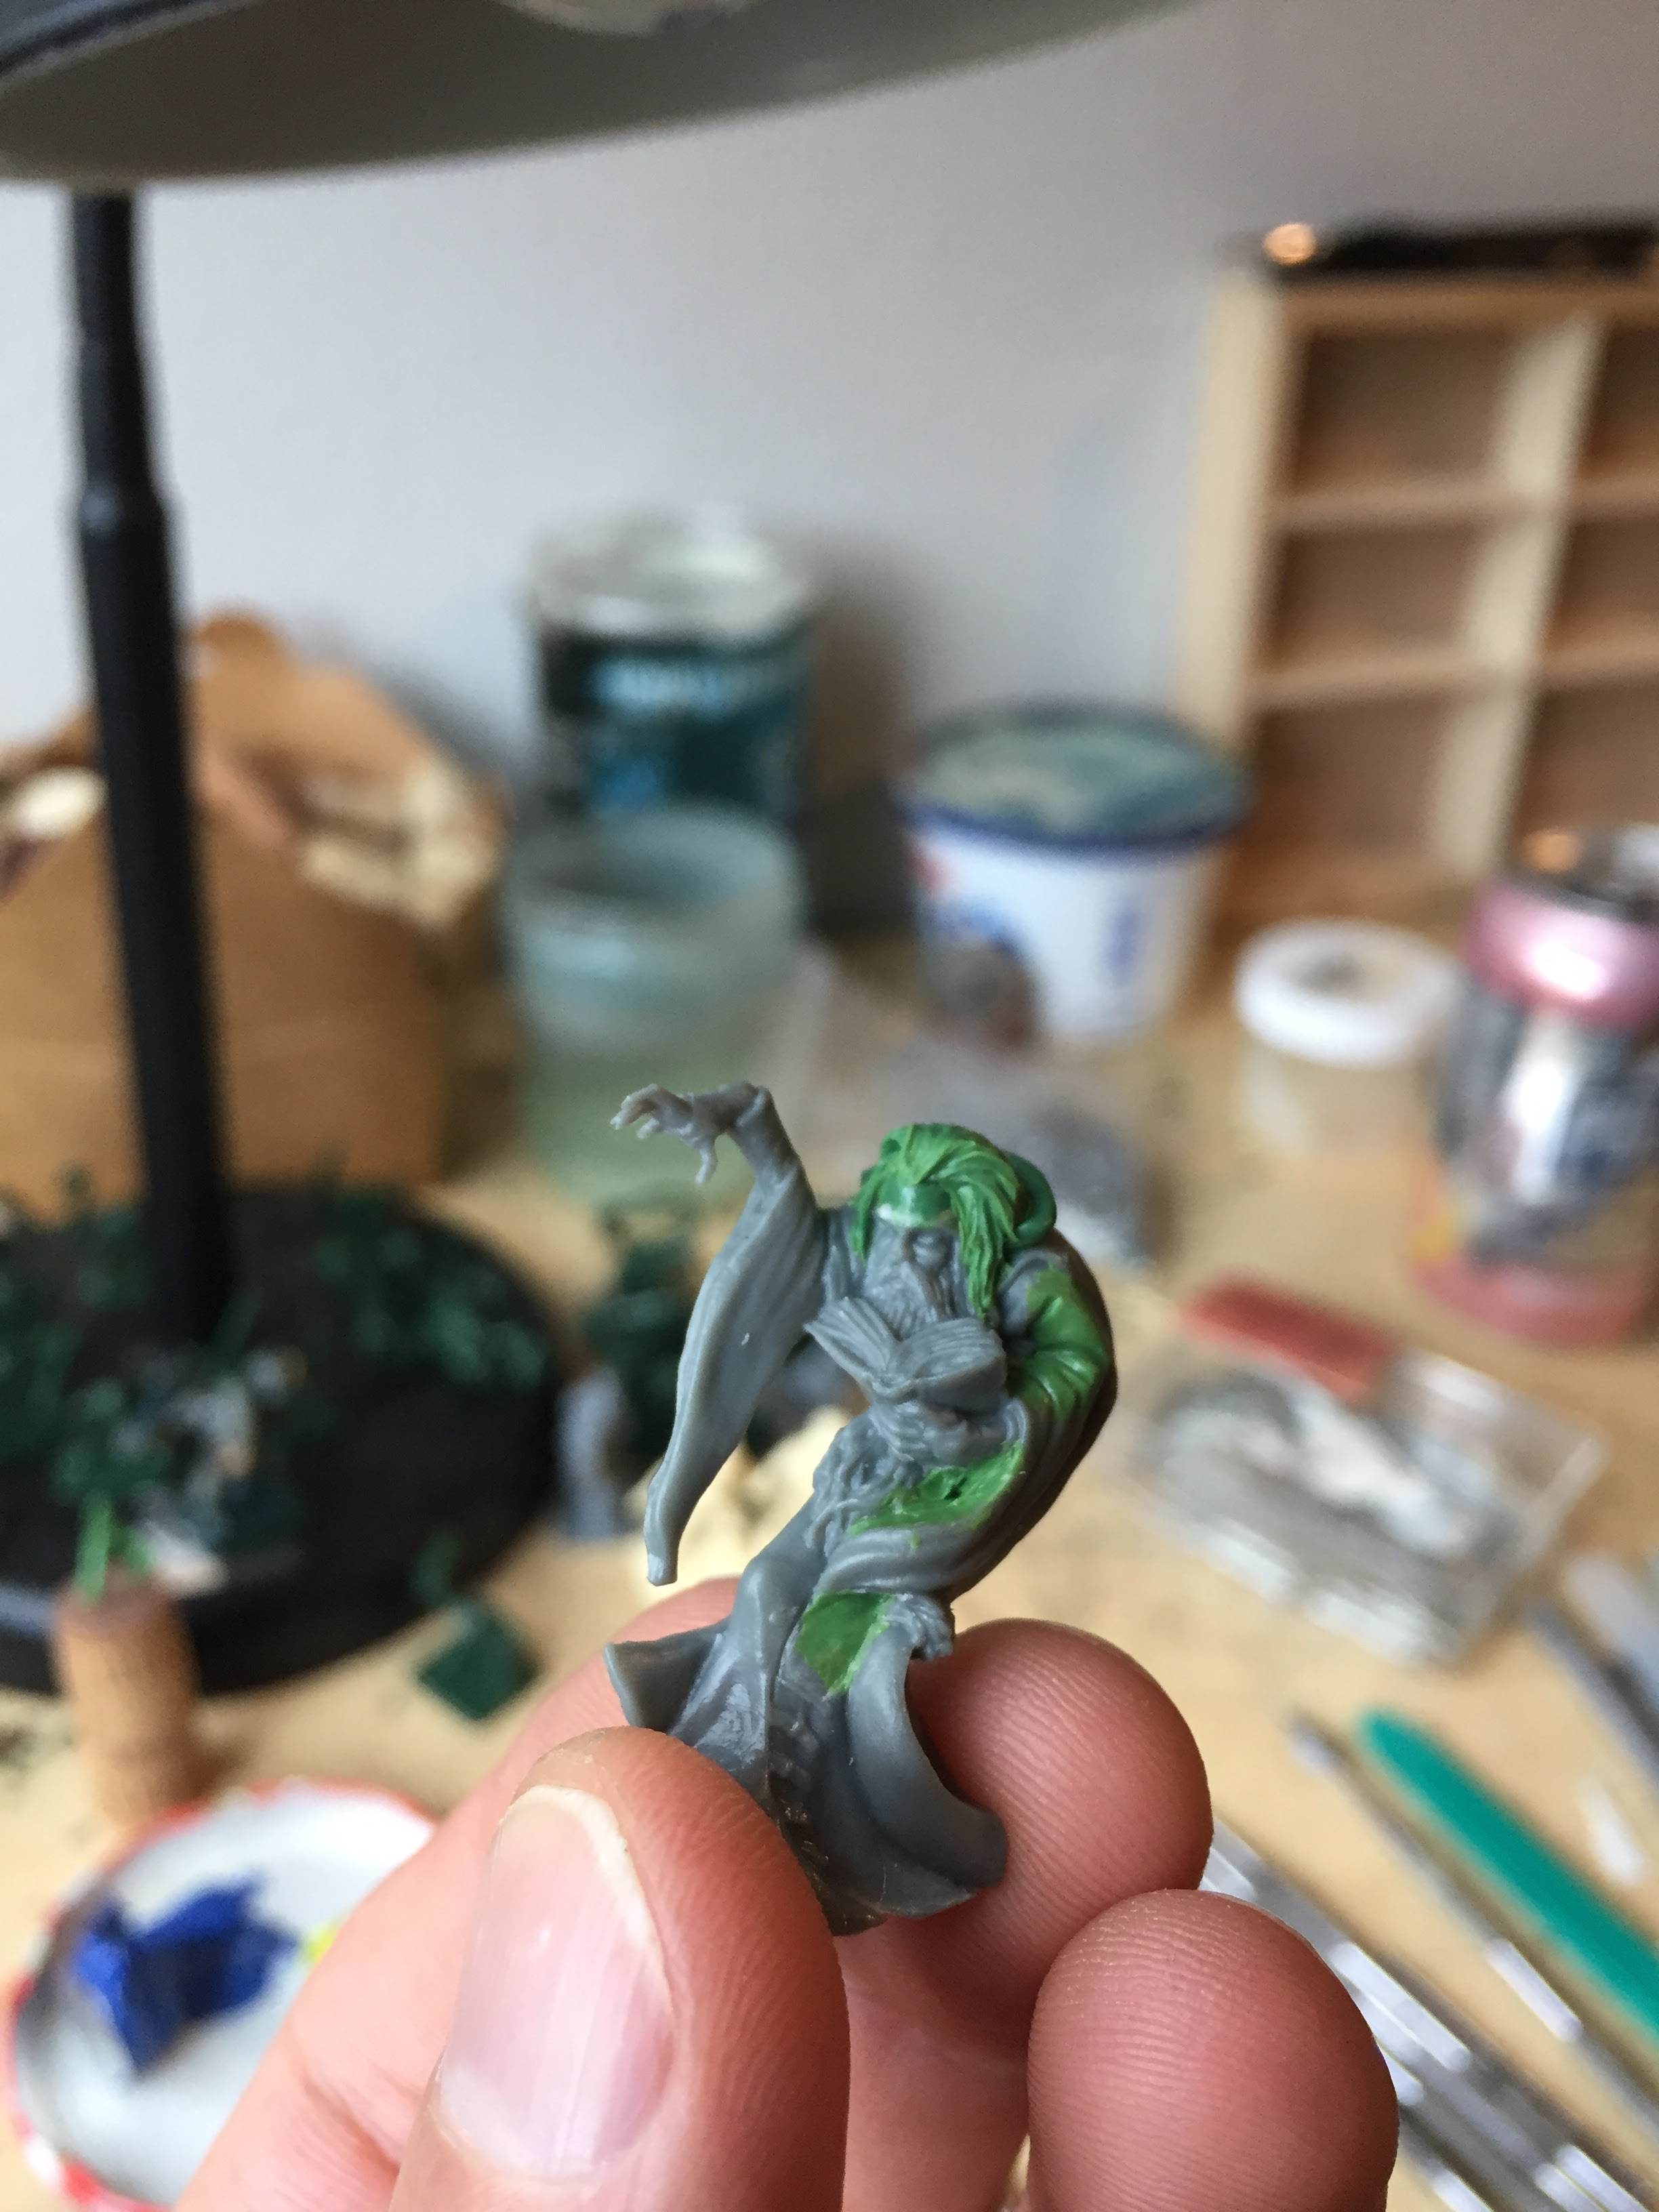
Having dabbled with the ruinous energies of Chaos in his pursuit of Power (and trolling his Girlfriend's kids in quests), Byron became Zargon.

Before I can get into the wrap up stuff, I first have to share additional rank and file models I painted for this month:

Orcs with shield x3: 25.5 pts

Zombies x4: 16 pts

Goblins with shields x3: 9pts

Link to the Fan Army Book I made so I can play Warhammer with my army.

And, with that I have fulfilled my Oath to paint all of my HeroQuest Minis from 3 boxes of HeroQuest and the Return of the Witch Lord expansion. 


But, before I can share pictures of the complete army and talk about my travails and struggles, I have further additions for the final month: terrain!

Bone piles to liven up the battle field! (pun intended)

I also added stalactites to this terrain piece. I also positioned
minis on it to convey an allusion to the box art :) 

Okay, Now for the big pictures of the whole army that you have all been waiting for!

2925 Points

The whole army in one shot on my custom-made HeroQuest bookshelf (link for how I did it). 


15 Chaos Warriors bearing the Black Banner of Zargon and flanked by 2 warlocks

9 Fimir shading themselves from the midday sun with their shields.

3 Gargoyles guarding the catacombs of evil.

10 mummies lurching forwards, spreading their dire graverot.

21 Goblins chittering away.

27 Orcs ready to march on Zargon's enemies

16 skeletons (one is not in the picture since he was on Zargon's castle)

10 Zombies shambling in the dark corridors.

Terrain from the Realm of Zargon:

A small mountain range with a walkable pass.

A small mountain range with an entrance doorway.

Castle Zargon.

Reflections

Last year I noted about moving in with my partner and her kids and how my free time evaporated. That still largely holds true. I had to get assertive about carving out times in the evenings after the kids had gone to sleep to hobby. 

Prior to beginning the project I was playing HeroQuest with some friends in Portland. This really helped with my enthusiasm. However, we finished the game fairly quickly into the Challenge and this really sapped the creative energies for the project. 

I tried to keep up the pace of painting minis to match the quests to make my posts more thematic, but this was a hard pace to maintain. 20-30 minis a month is rough. 

Interim
Last year I speculated "Between now and the next OWAC I need to finish the remainder of my Gusseldorfers, sculpt up some more Gusseldorfers (knights, and a queen). I might then start sculpting some nordic dwarves." Frustratingly, this is the same interim plan this time around because I didn't get around to doing these tasks since everyone got dire sick and we had to relocate to a new home in December.


Next OWAC
Just like for the interim, last year I speculated 
    "I am very enthusiastic about the next OWAC. I have an odd collection of old citadel and marauder         wood elves. I have so many ideas! My plan is to paint them up like hippies from the 60's! I'm gonna     sculpt extra flowers in their hair. I've created a random name generator that pays homage to the             naming conventions of Forendron's last stand. I've gonna give them some banners with toxic                 positivity slogans on them like "We gave peace a chance!" "Good Vibes Only!" as well as some             alterations of beloved hippy songs! And, if the timing works, I'd like to recreate the famous Olley         "Pint Pals" with elves smoking."
This goal stands the same except that I have since accumulated even more elves for the project. :) 


My girlfriend took this pic of me after dying my
hair for the Zargon pic; I include it here to show that
 I am, in fact, not an evil wizard.

Tuesday, July 4, 2023

Byron's Realm of Zargon! - Wildcard Month (565 pts)

 The Home Stretch! 

This month I am very excited to present 

ZARGON: The evil Chaos Lord of Darkness! (565 points)


Sadly the mini minis were too big, so I had to settle
with board squares that were too big rather than a
 proper warhammer-scaled HeroQuest board :/


The door was made from a popsicle stick


There's a lot of nerdy details I want to explain here. So! First, the reference. In the original game of heroquest there are few images of Zargon, at least outside of the canonical sticker album. The most famous is his imposing presence on the front of the DM screen included with the game from which he looms over the heroes. 


The Second image that I am drawing from is from the HeroQuest Winter Special comic book created by Marvel Comics. Now, oddly, in this version, we are told that the old man is in fact MENTOR! the goodly wizard that helps us. And, Zargon is presented as a bland mix of Dr. Doom and Skeletor. However, I loved the image of him playing with the heroes as they moved through his dungeon. 


To accomplish this look I needed a handful of things:
  1. a wizard - from reaper bones - he was then heavily converted
  2. a board -  I made from a blister pack
  3. a table -  from HeroQuest; I replaced the cardboard with plastic from a blister and sculpted wood grain onto it
  4. a throne - from HeroQuest; the cardboard was replaced with blister pack and sculpted to look like a cushion
  5. A evil shield skull which I sculpted myself to match the icon on the dice as a repeated motif throughout the army.
  6. furniture doodads - these all came from the game and include a rat, candle holder, skull, and bottles
  7. dice - these are chopped up green stuff
  8. Minis for Zargon's board - these were printed from thingiverse and scaled down. These were graciously printed by Roger from the oldhammer community in Portland. 


Moving along...

The Realm of Zargon


Oof, that underlighting isn't doing it any favors.

The minis shown in this section are there to demonstrate interactivity and do not represent minis that I have painted this month. 

Castle Zargon


The Mountains of Zargon


Lots of skulls so you know it's evil


Shoutout to Lissanne who gave me the Warhammer Quest doors used throughout

This cave is vaguely inspired by the artwork on the front of the box.
Two doors with steps and a big broad step. When the heros are done
I will mock them up with the monsters to pose like the box art.


Sadly, I didn't have time to finish the two bone piles I had also glued together... next month I suppose...

Finally...

How I did it.


Throughout the process I've shared a few WIP of the terrain and gotten many people asking how I did it. So I thought I'd share my process...

Step 1. Inspiration


I went on google and looked through old sources for inspiration. 3 sources really stuck with me. 

1. Ian Miller's buildings that seem to organically form out of mountains and spire upwards
2. The Squat Terrain from early Warhammer 40k Epic 
3. Castle GraySkull


Step 2. Gather Supplies


With my project in mind, I started to gather supplies to me like Sauron summoning the forces of evil. Basically, Halloween was just over and decor was real cheap online.


I also collected other supplies like carboard and tubes. Right proper materials for oldhammer terrain.

It's important to have a variety of cardboard types, each has its uses.

Parchment paper tubes > paper towel tubes

Additionally, I would note that few materials can beat masonite as a material to base you terrain. 

Step 3. The foundation


In this step I used a lot of hot blue to glue together corrugated cardboard into the rough shape of the castle. Holes were cut for the warhammer quest doors. It's pretty rough. 


take note of the various curved triangular pieces under the walkways and along the base. These will be important for later steps for shaping the mountainy parts/organic stone.

Step 4. Start of the planks and bricks.


I cut out many many many card stones and just started gluing them on with PVA glue. The wood framing is all popsicle sticks. You will also notice I cut out the windows, arrow slits, and doors at this stage. 


Note the use of clothes pins. They are a cheap but effective wood detail.


Step 5. The Teeth

I sculpted some teeth our of polymer clay. Baked them. Then I drilled holes in them and stuck paperclips in them. This allowed me to stab them into the foam skull and play with various arrangements. Once I got the arrangement right I glue them in. 

This was a bad arrangement.


Step 6. Foundation for the rocks

For this step I took these weird cloth-like paper towels that were thick and without a repeating pattern, and I cut them (or ripping works better, it gives a more natural edge) into shapes appropriate to where I was going to put them, submerged them in diluted glue and draped them over the curved triangle bits. This gives more volume to the shape and doesn't have you fighting the runny plaster later. 


Step 7. Doors
I made doors from sheets of balsa wood. The metal components are card. the door hand is a bead with a loop of wire. The doors were then glued in while I could still reach inside the castle.


Step 8. Plaster

I put plaster on the castle. The plaster is a mix of ripped up toilet paper, PVA glue, sand, and plaster of paris. This took multiple batches. Haste makes waste.

Step 9. Texture
I added the texture that represents the plaster/stucco between the timbers. This was gesso and sand. I also used it as the ground/earth texture on the base.


Step 10. Paint it up

I spray painted the whole thing with a dark brown rattle can, then with a darkish turquoise rattle can to make it a little spookier. The rest was layers of dry brushing.


Step 11. Windows

For windows I use these see through drawer liners. I find them with diamond patterns. I cut them into small rectangles and glue them in. You have to do this before you glue on the roof or it becomes impossible
[Image not found]

Step 12. The roof

I start by putting a single layer of card across the top. This acts as a good surface to glue the shingles onto. For the shingles, some people will tediously glue them on one at a time. I don't. I make strips of card and cut little triangles out at semi-consistent intervals. I also cut the ends of each layer inwards like a trapezoid so that the layers all overlap each other. The strip technique is tricky for the cone towers. But basically, It's using a circle of the same dimensions you used to make the cone, and then cutting out rings of different radiuses. 


Step 13. Finishing touches. 
I painted the roof and glued static grass the base. 


The mountains
The mountains were the same technique as the organic rock parts of Castle Zargon but bigger. Large curving triangles were cut, and glued to a base to make the frame of a mountain range. Paper cloth was put in glue-water and draped over the frame. Then plaster was put over it. Spray Painted. Dry brushed. Shaded. Grassed. 


Search This Blog