
An April paint pic for that thumbnail yo!

Whilst I'm on the subject, here's a bit of a step by step on these. I started out thinking that it's the soil their standing on which is this colour, although someone somewhere said a while ago it looks like their standing on a really rusty surface. Kinda cool.
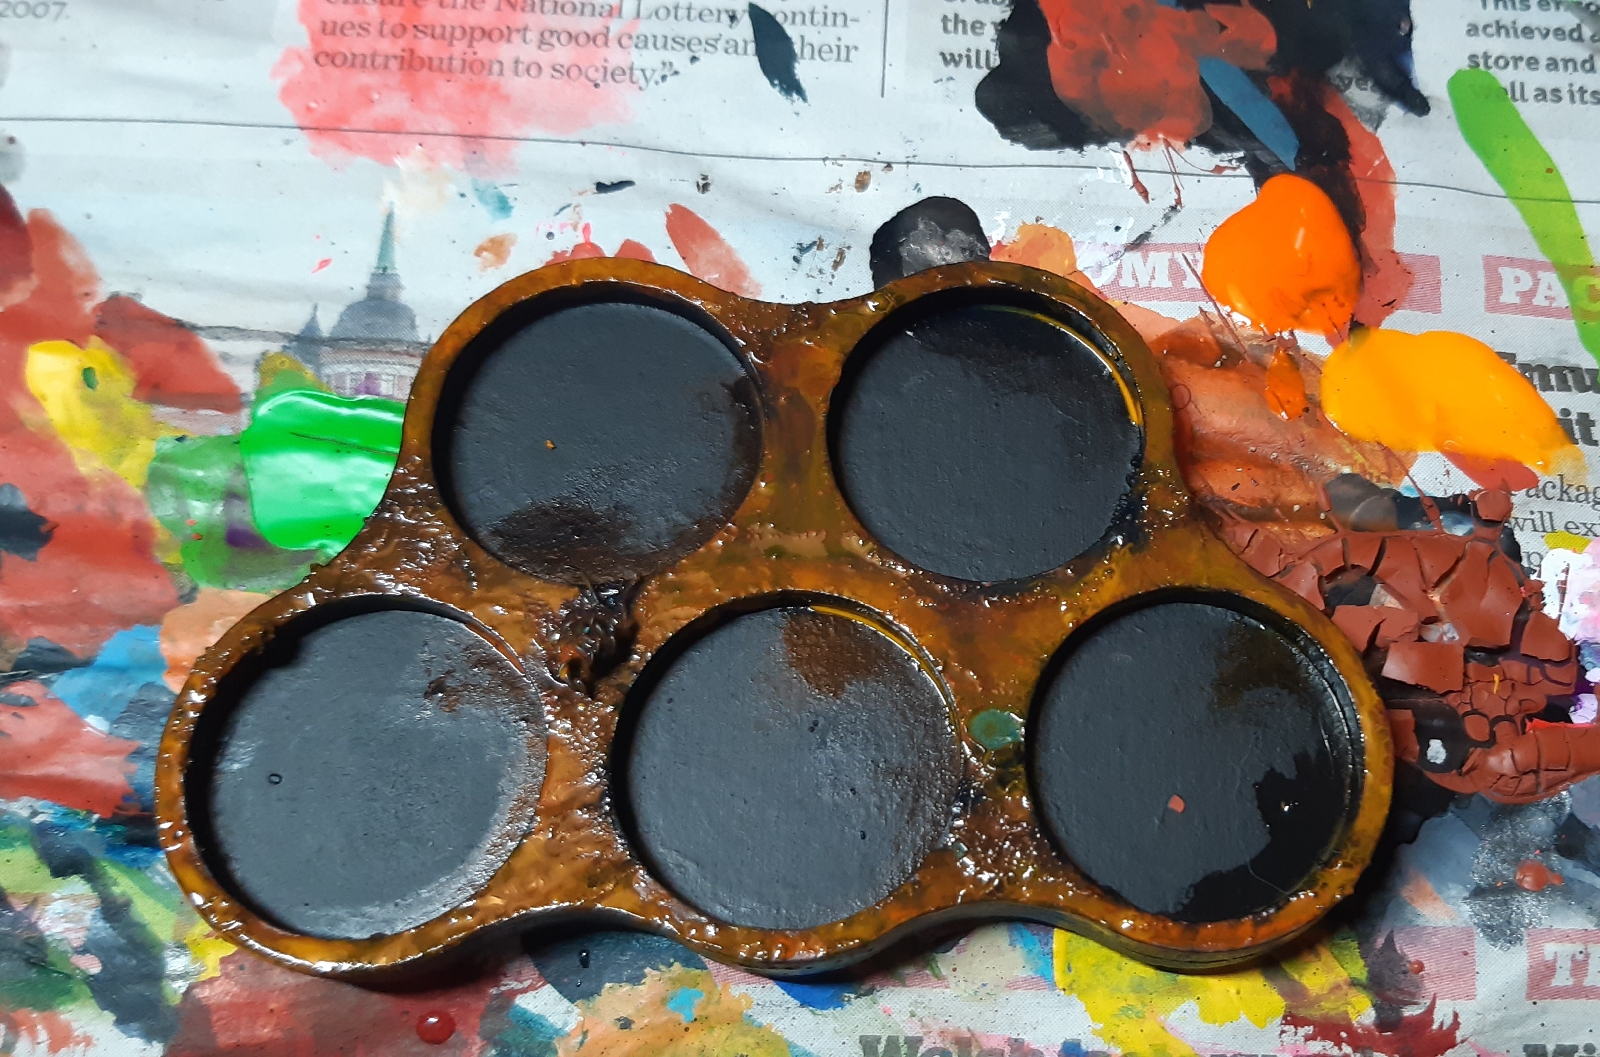
Before any paint, I glue the two halves of the movement tray together and add some s Iand and wire and skulls. Less is more, which I tend to struggle with.
I'm using Greenstuff World movement trays (link), which I've spray painted white (link). I tend not to worry about the outside edges of the tray, as that'll be painted black. You'll find anyway that the spray will soak into the wood - coverage isn't brilliant, but really that's kinda to our advantage later...

Next up is a coating of Games Workshop's contrast paint: Terradon Turquoise (link)

When thats dry, I add a coating of Greenstuff World's crackle paint, Martian Earth (link)

Black, to cover anything left white! there's a few coats of this later, so thin and quick is ideal.

Another coat of black. Most usually I've had a cup of tea, or painted something else whilst waiting for it to dry. It's quite good to paint a model you're stuck on in these little windows, as you know the time is super short. Hello patch of armour on a war machine...

Next up, I add some neat splotches of Terradon Turquoise...

And then load up the brush with water and mush all the splotches together. Sometimes you have to add a bit more turquoise.

Then I dry the paintbrush off (usually by scrobbing it on the paper there, or maybe sometimes on my clothes...), and I take off some of the watery paint with the dry bristles.

Next - I've added some Greenstuff World fluorescent orange (link), whilst the turquoise is still wet. You'll find that the wood of the movement tray will suck up some paint still, so everything dries a little faster than expected, which is noice.

This is then stippled in with a dry(ish) brush (again scrubbing the brush I've used throughout on the paper to dry it off a bit)

I've added some GSW flurescent yellow/orange whilst everything is still wet

(you can maybe see it more clearly on this big tray)

And stippled it all together. You can see one of the brushes I've used throughout this. It ain't pretty!

They'll look like this after stippling

I've gone slightly back in and added a few small botches of the yellow-orange paint just to lighten stuff up if I've been a bit unlucky/too heavy handed with the stippling. Hard to really notice, but hey.

See the drips and stuff?

The paint'll be a pain if it dries thick down the rim (the models won't sit right), so I just try and wipe it off really very roughly, with a damp brush. Thinning those drips out with the damp brush will make the final covering of black actually be the final coat, so....

Then another layer of black to cover up the spills. It should cover them really well by now :).

Then I place dots of GW's Baharroth Blue (link) on the lumpy sand, and some small dots over any crackle paint bits that have fallen off...

Paint skulls with P3 Menoth White Base (link)

The Menoth White Base mixed with a bit of pure white

Add pure white

Add GW's contrast paint Skeletopn Horde (link)

Then I suck some of the contrast paint off with a dry brush...

Paint the wire with dibdabs of silver - in this case I used Vallejo Game Colour: Silver (link)

And here they are complete...
They get a quick varnish of Hycote Clear Lacquer (link) followed by a spray of GSW matt varnish (link). As a Thing, every model gets this varnish combo.

..and in use!


Anyhow - enuff bases, here's the orks in the freebooter skwad!
A Knightmare Miniatures ork hybrid (link). A great sculpt and the exact size to, um, blend in!


Here's a boy with mechanical trousers. (A two-parter model where the legs are separate from the torso)


(Actually..,before I go any further, here's the gretchin I counted points for last month, but forgot to take a picture of) :


And now the meat of the post: Cyboars!
Pretty similar colouring for these lads, just sticking to the yellow and red, and now it seems that the dark blue has prevailed as a colour, rather than the lighter blue of my earlier models.
A mid blue for the shoulder pads, helmets and backplates just to differentiate them slightly from the regular troops. I really was tempted by body paint - even if it was a simple slash on the face and a few arm rings - most likely in white. I might go back in a few months and do this, but it's more than likely they'll just stay as they are:
1


3


4


Onto some squigs. These are the rest of the knightmare miniatures range. There is one more which looks like a mushroom, but I have shunned it in favour of the animals beasties :)


As promised last month, here's a group shot of ALL the squigs, including those from last year.
A veritable herd.
Or flock.
Or bite.
Whatever :)

I did also manage to find the last catalogued runtherd, which I'd missed last year as he is listed in the Snakebite section rather than the runtherd section. I must've glossed over him a hundred times 😂. Anyhow, I painted him up in freebooter colours rather than his snakebite calling, although to be fair I think he'd easily fit into both camps... The banner will be done next month, (along with the ork biker nob banner).


And now, a Big Gun! This one is to make up the points, as at the time of writing (27th April) I do not want to paint another cyboar... This gun doesn't appear in the Ork Codex I'm using for points, but it'll happily stand in for a Splatta Kannon...


As you can see, the Kannon's a bit rusty, so as a crewmember I've painted up this grot oiler...


And the loader. Admittedly I could've added a chain and a ball to the rocket, but as always, I chickened out and kept it as the unaltered model...


I'm really struggling with painting up the regular plastic boys I had planned to paint, so I think that I might switch them out for more gretchin for May's post, or just some regular metals. Anyway, it's never really too late to change me mind on this, so if I do paint something not planned, I'll timestamp it next to the White Dwarf as per this month :)
Anyhow, here's a little runty assistant. Selling some tasty shneks.


I struggled a little with the shades, but I'm counting it as done anyway... The spelling mistake on the board was totally natural - I really thought I had it correctly spelled right until I varnished him 😂 Thankfully it'll just be read as a snotlings lack of literacy rather than my own! I should really have spelled it S K W I G ...
Intro (link)
Month 1 (link)
Month 2 (link)
Month 3 (link)
Month 4
12+4...Freebooter
12+2...Freebooter
12+15...Cyboar
12+15...Cyboar
12+15...Cyboar
12+15...Cyboar
12+15...Cyboar
18...Runtherd
Squig
Squig
Squig
Squig
3...Runt assistant
60...Big Gun with 2 crew
Total: 246
See you next month for some motorised Wildcard shenanigans :)
Prolific and beautiful! I love looking at the figs too, as most of them are new to me, and often funny! I love the humor of the old Orks and Grots!
ReplyDeleteThank you!
DeleteThe sculpts are outstanding and the major draw for me collecting them.
Hopefully, for the final post I'll manage to pop some paint on a few of the rarer o&g models, including one of my favourite things - gretchin with flags for highlighting the wounded so that the dok can find them to fix them up and get back into the thick of it :)
Love the basing tutorial, though it does seem like it has more stages than I put into painting my minis... which is why it looks so good, I guess :) All the boyz look great, as always
ReplyDeleteA lot of those stages are a blur together - in reality it's kinda lika all one big step, as the paint is wet throughout. Takes mabbe 3min after the crackle paint has dried...
DeleteWhen broken down like that, it does look like a lot, but in my mind at least it's all there, warts 'n' all - and not just the meme of how to draw an owl 😂!
Read your posts are always a pleasure. Really like the way you paint orks...
ReplyDeleteah man, thanks a lot!
DeleteYour bright colouring and skill make me green with envy!😉 It's nice seeing such a range of figures brought together cohesively like this - especially all those various squigs. Really great to see the vintage cyboars (the poor things!).
ReplyDeleteNice one, cheers! It's a daunting thing to do, for sure - I'm sure in a few years I'll look back and wished I'd painted them different or whatnot (especially such a bright/strong base colour or even the base size choice such as the ovals for th ebikers and boars), but on the otherhand thinking like that tends, in my personal experience, to see zero progress! At the moment though I am super chuffed with them :)
ReplyDeleteI'm pretty sure Kev Adams misspelled it the same way on the slotta tabs of some sqigs, so you're in good company!
ReplyDeleteHa! That is good to know :) Cheers!
DeleteBrilliant! Maybe if you are fed up with Cyboars now you might find some love for the Warbikes? No... I'll get my coat. ;)
ReplyDeleteSquig Skwod!
Well, hopefully! I'm going to give it a shot at least. They're a tiny bit painted at the moment (just the basecoat of red) and I'd love to finish the OWAC without any half painted models.... :)
DeleteI'm actually squinting to looking at these guys, they're so bright!
ReplyDeleteHa! Thank you!
Delete